Your Dell notebook computer ships with an optical drive installed in the module bay. However, the device security screw is not installed in the optical drive but packaged separately. When you install your device in the module bay, you can install the device security screw.
NOTICE: Insert devices into the module bay before you dock and turn on the computer.
NOTE: You do not need to install the device security screw unless you want to secure the module inside the computer for security purposes.
If the Device Security Screw Is Not Installed NOTICE: To prevent damage to devices, place them in a safe, dry place when they are not installed in the computer. Avoid pressing down on them or placing heavy objects on top of them.
1. Press the device latch release so that the latch release pops out.
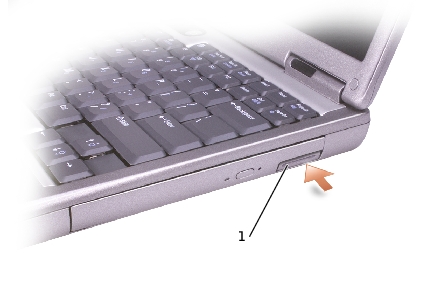
2. Pull the device by the latch release to remove the device from the module bay.
 If the Device Security Screw Is Installed
 1. If the computer is connected to a docking device (docked), undock it. See the documentation that came with your docking device for instructions.
NOTICE: To prevent damage to devices, place them in a safe, dry place when they are not installed in the computer. Avoid pressing down on them or placing heavy objects on top of them.
2. Close the display and turn the computer over.
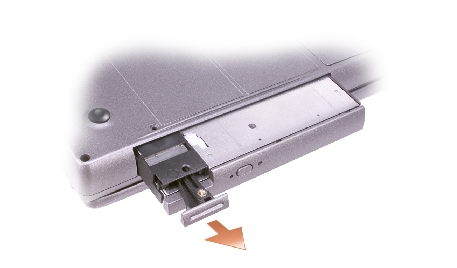
3. Use a #1 Phillips screwdriver to remove the M2 x 3-mm screw from the bottom of the computer.

4. Press the device latch release so that the latch release pops out.
5. Pull the device by the latch release to remove the device from the module bay.